• Skip to primary navigation
  • Skip to content
  • Skip to primary sidebar

Main navigation

  • Home
  • About
  • Recipes
  • Portfolio
  • Contact
  • Bloglovin
  • Facebook
  • Instagram
  • Pinterest
  • RSS

September 25, 2014

Frozen Chocolate Banana Pops

Frozen Chocolate Banana Pops


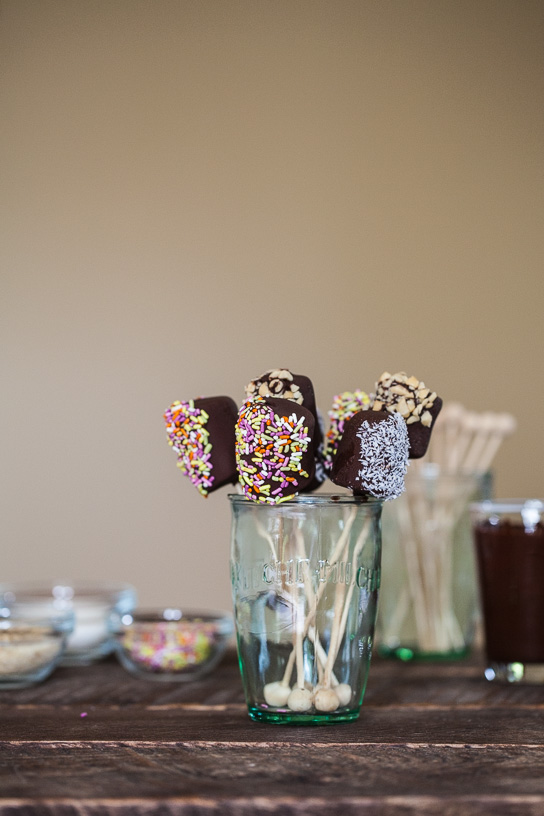
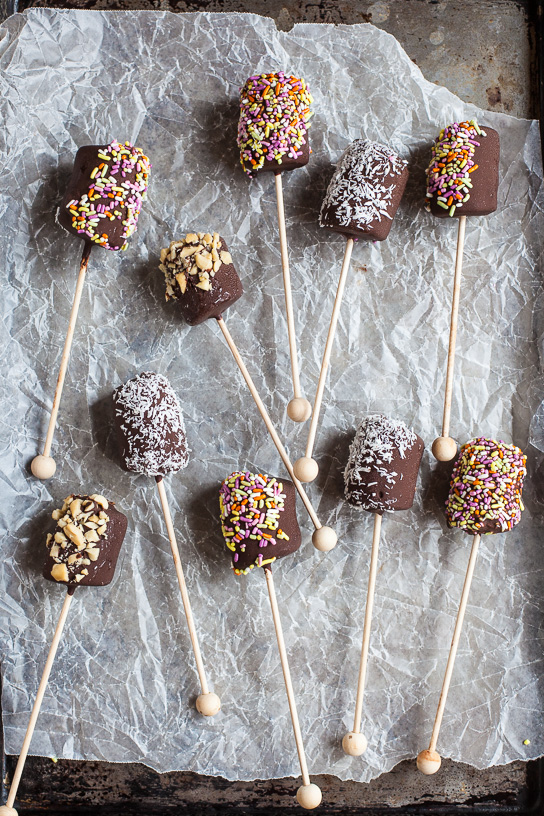
Yes, it’s now officially the first week of Fall and I am already taking a break from Fall flavors to discuss the awesomeness of these frozen chocolate banana pops.  I had been saving these cute wooden sticks from The TomKat Studio  for what seems like forever and I finally decided that these frozen banana pops were worthy of their use.

Frozen Chocolate Banana Pops

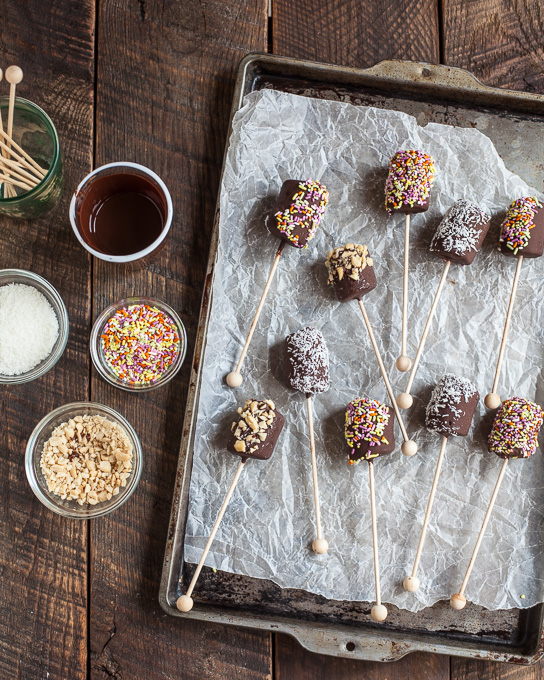
Eating these take me back to carefree childhood days and I feel like I’m eating something completely indulgent, except they are actually not so bad for you since they are basically just frozen bananas wrapped in some dark chocolate.   Banana pops are fun and simple to make.  First, cut each peeled banana into small pieces and insert a wooden stick into each piece.  (I cut the bananas into fourths and cut the tips off of the ends so that each piece had a more uniform shape.)  Next, freeze the bananas for at least a couple of hours.  It’s important to be patient and not skip this step.  Now is when the fun begins!  Melt the chocolate with a bit of coconut oil so that the chocolate becomes slightly thinned and velvety smooth.  Take the frozen banana pop and quickly dip it into the melted chocolate.  Allow the excess chocolate (is there such a thing as excess chocolate?!)  to drip off the banana and watch it solidify into a yummy chocolate shell.  If you want to add a topping, dip the chocolate covered banana into the topping before the chocolate completely solidifies.  If you wait too long, the toppings will not stick, but if you dip too soon, you will have a sticky mess.  Takes a little practice, but you will get it, I promise.  I think I am going to go order a huge supply of these wooden sticks because from now on, we are going to be making these all of the time.  I’m thinking birthday parties, playdates, family nights…. chocolate banana pops for everyone.  Oooh yeah.

Frozen Chocolate Banana Pops

Frozen Chocolate Banana Pops

Frozen Chocolate Banana Pops

Print
Frozen Chocolate Banana Pops
Serves: 16-20 pops
 
Ingredients
  • 2 3.5-ounce dark chocolate bars (I used bars with 72% cacao)
  • 1 tablespoon + 1 teaspoon coconut oil
  • 4-5 bananas, cut into pieces
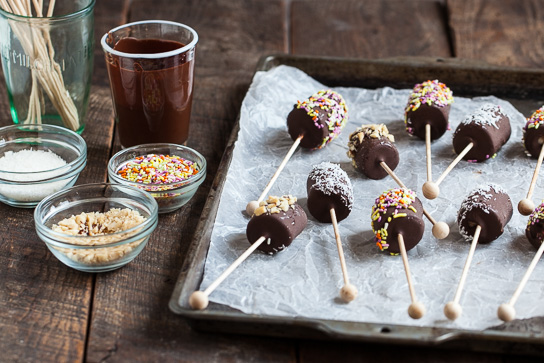
  • sprinkles, coconut, or crushed peanuts for dipping
Instructions
  1. Insert wooden stick into each banana piece. Freeze for at least 2 hours.
  2. Set a small glass mixing bowl over a small saucepan of simmering water and place the chocolate and coconut oil in the mixing bowl. Stir until the chocolate is completely melted and smooth. Pour the chocolate into a medium sized glass for easier dipping.
  3. Quickly dip each frozen banana piece into the melted chocolate and allow the excess chocolate to drip off. After the excess chocolate has dripped off, but before the chocolate is completely solidified, dip the chocolate into desired topping. Serve immediately or return to freezer to serve later.
3.2.2499
Continue Reading

September 22, 2014

Pumpkin Millet Muffins

Pumpkin-Millet-Muffins-2

Goodness, I think I bake way too many muffins around here.  It’s just that they’re so perfect for a quick breakfast,  packing for lunches, and they always seem to hit the spot when I’m in the mood for eating something sweet but not too sweet.  And it’s 15 minutes to make the batter, 20-25 minutes in the oven, and then they are done!  It’s instant gratification in the kitchen.

Pumpkin millet muffins are one of my favorite variations of the more traditional pumpkin bread.  It has all of the warm flavors and spices that you would expect from a pumpkin muffin, but the addition of toasted millet adds extra nutrients and a little crunch.  It’s really quite lovely.  I used coconut sugar as the sweetener as coconut sugar has been one of my top alternatives to refined sugar lately.  It has some caramel undertones to it so I find that it works well as a substitute in recipes that call for brown sugar.  The coconut flavor is hardly noticeable at all in these muffins.  I only used 1/2 cup of sugar since I prefer my muffins not to be overly sweet (theses are muffins after all, and not cupcakes), but go ahead and increase the sugar to 3/4 cup if you prefer a sweeter muffin.  Also, note that this recipe calls for 1 cup of pumpkin puree for 12-muffins.  Since most canned pumpkin comes in 15-ounce cans, I usually double the recipe and just use the entire can of pumpkin.  Serve these warm from the oven or these also store well in the freezer for later.

Pumpkin-Millet-Muffins-4

Print
Pumpkin Millet Muffins
Serves: 12 muffins
 
Ingredients
  • ½ cup millet
  • 1¼ cup whole wheat pastry flour
  • ¾ cup all-purpose flour
  • 1 teaspoon baking powder
  • ½ teaspoon baking soda
  • ½ teaspoon salt
  • ½ teaspoon cinnamon
  • ¼ teaspoon nutmeg
  • ¼ teaspoon ground cloves
  • 1 egg
  • ½ cup plain yogurt
  • ½ cup whole milk
  • 4 tablespoons (1/2 stick) unsalted butter, melted
  • 1 cup canned pumpkin puree
  • ½ cup coconut sugar
Instructions
  1. Preheat oven to 400. Butter or line a 12-cup muffin pan.
  2. Heat a large skillet over medium-high heat. Add the millet and stir with a wooden spoon until millet starts to pop and becomes golden brown, about 3-4 minutes. Transfer millet to a small bowl to cool.
  3. In a medium mixing bowl, mix together the flours, baking powder, baking soda, salt, cinnamon, nutmeg, and cloves. Add millet to the flour mixture and stir to incorporate.
  4. In a large mixing bowl, whisk together the egg, yogurt, milk, butter, pumpkin, and coconut sugar. Add the dry ingredients to the wet ingredients and stir until just combined.
  5. Divide muffin batter among prepared muffin cups.
  6. Bake 22-25 minutes, until a toothpick comes out clean. Allow muffins to cool in the pan for 10 minutes before transferring them to a wire rack to finish cooling.
Notes
adapted from Whole Foods
3.2.2499
Continue Reading

September 18, 2014

Quinoa Stuffed Acorn Squash

Quinoa Stuffed Acorn Squash | Gather & Dine

Rough morning today because I woke up grumpy and crabby for no apparent reason.  How does this happen to me?!  Even in the midst of having an infinity number of reasons  to be thankful, my heart was not focusing on them.  I really wanted to curl up and go back to bed, but I was determined to finish preparing dinner in the morning so that I could move on to some work that had been piling up on me later in the afternoon.  After I threw the acorn squash in the oven and quickly put together this quinoa pilaf, I made a cup of hot tea and spent a few quiet moments with God.  The sweet autumn smell of roasted acorn squash began to fill the house and my heart began to soften and slowly fill up with gratitude once again.

This quinoa stuffed acorn squash has an abundance of flavors and textures.  Crunchy hazelnuts and pumpkin seeds, earthy oregano and swiss chard, and sweet dried cherries are all mixed together with quinoa and piled in a golden roasted squash.  And guess what?  I have the best tip ever for cutting raw squash.  Microwave the whole squash for 30 seconds to 1 minute, depending on the size of the squash and strength of the microwave.  The squash will soften ever so slightly and it will now be much easier to cut in half.  No more struggling trying to get that knife through a rock hard squash ever again.  The best squash tip ever, right?  You are welcome.

This makes double the amount of quinoa pilaf needed to fill one squash so you can either use it for another squash or it is also excellent on its own. Even though I made this ahead of time in the morning, the hazelnuts and pumpkin seeds lose a bit of their crunch after a few hours, so I think it is best served immediately after it is prepared.  Stuffed squash can be a festive side dish (hello Thanksgiving!) or it can be a nice lighter vegetarian main course.  Hope you enjoy!

Quinoa Stuffed Acorn Squash | Gather & Dine

Print
Quinoa Stuffed Acorn Squash
 
Ingredients
  • 1 acorn squash
  • 2 teaspoons olive oil, plus more for brushing on squash and oiling pan
  • ½ cup quinoa, uncooked (I used half red, half white quinoa)
  • 1 cup finely chopped yellow onion, about 1 medium
  • 3 cups lightly packed chopped swiss chard
  • 1 tablespoon fresh oregano
  • ¼ cup toasted hazelnuts, chopped
  • ½ cup roasted pumpkin seeds
  • ¼ cup dried tart cherries, chopped
  • ¼ teaspoon sea salt
  • ⅛ teaspoon ground black pepper
  • additional chopped hazelnuts and oregano for garnish
  • additional salt and pepper for seasoning squash
Instructions
  1. Preheat oven to 350. Lightly oil a large baking sheet with olive oil. Cut acorn squash in half lengthwise and remove seeds. Brush olive oil on both cut sides of the squash and season with salt and pepper. Place halves face down on the baking sheet and bake for 30 minutes. Turn halves cut side up and bake for another 10-15 minutes, until squash is tender.
  2. In a medium pot, boil 3-4 cups of water over high heat. Rinse the quinoa in a fine mesh strainer. When the water is boiling, slowly add the quinoa and boil uncovered for 11-14 minutes. After 10 minutes, start checking the quinoa for doneness. The quinoa is done when the "dot" in the middle of the quinoa starts to disappear and when some of the white filaments start to come off the seeds. Drain the quinoa over a fine mesh strainer.
  3. In a saute pan, heat olive oil over medium heat. Add onions and sauté until onions start to become translucent, about 4-5 minutes. Add the oregano and swiss chard and continue to cook for another minute. Add the cooked quinoa, hazelnuts, pumpkin seeds, cherries, salt, and pepper and continue to cook until the mixture is warmed through. Season to taste with additional salt and pepper.
  4. Spoon quinoa mixture into the acorn squash and garnish with some additional oregano and chopped hazelnuts.
Notes
adapted from The Spicy RD
3.2.2499

Continue Reading

  • « Previous Page
  • Page 1
  • …
  • Page 50
  • Page 51
  • Page 52
  • Page 53
  • Page 54
  • …
  • Page 69
  • Next Page »

Primary Sidebar

wholesome recipes

made for sharing

browse

posts

Categories

Archives

Your

favorites

Roasted Harvest Salad + Champagne Vinaigrette
Sausage and Kale Spaghetti Pie
Griddled Pumpkin Steel-Cut Oatcakes
Chocolate Fig Swirl Rolls

Subscribe

by email

Load More...
Follow on Instagram

Follow

on instagram

© GATHER AND DINE 2025. SITE DESIGN BY WOODEN SPOONS KITCHEN