• Skip to primary navigation
  • Skip to content
  • Skip to primary sidebar

Main navigation

  • Home
  • About
  • Recipes
  • Portfolio
  • Contact
  • Bloglovin
  • Facebook
  • Instagram
  • Pinterest
  • RSS

January 20, 2015

White Bean Chicken Sausage Soup

White Bean Chicken Sausage Soup

With cold winters come so many things that I love- quiet snowfalls, warm cozy sweaters, steaming hot cocoa by the fire, and skiing season.  Skiing season was practically nonexistent for us while our kids were so small, but we’ve finally reached the stage when family ski outings are possible.  And now it’s better than ever.  I find great joy in watching a child persevere with fierce determination in learning stops and turns and then in seeing a triumphant smile after riding the chairlift for the first time.  With many of our Saturdays being away at the ski slopes, I’ve been relying on hearty soups such as this white bean chicken sausage soup to warm us after a day in the cold outdoors.  It always feels good to come home to a home-cooked meal without actually cooking and this soup is perfect for making ahead of time and reheating.  Pureed cannellini beans impart a rich creaminess without all of the butter, flour, and cream which are usually added to chowder-type soups.  A touch of heavy cream is added at the very end to round out the creaminess, but this is certainly optional.  This soup is scented with rosemary and thyme and contains a healthy dose of vegetables, although next time I might add some chopped greens at the end to make it even more nourishing.   Add a loaf of whole grain bread to this savory soup for a simple, yet complete and satisfying meal.

White Bean Chicken Sausage Soup

Print
White Bean Chicken Sausage Soup
Serves: 6
 
Ingredients
  • 1 Ib dried cannellini beans, soaked overnight, rinsed and drained
  • 8 cups water
  • 3 tablespoons olive oil
  • 3 garlic cloves, 1 smashed, 2 minced
  • 1 teaspoon dried rosemary leaves, finely chopped
  • 1 bay leaf
  • 1 large onion, chopped (about 2 cups)
  • 2 medium carrots, chopped (about 1 cup)
  • 2 celery stalks, chopped (about 1 cup)
  • 1 teaspoon kosher salt
  • ¼ teaspoon ground black pepper
  • 2½ teaspoons chopped fresh thyme, divided
  • 4 cups low-sodium chicken broth
  • 1 pound chicken Italian sausage, casings removed
  • ¼ cup heavy cream
Instructions
  1. In heavy pot, combine beans, 8 cups of water, 1 tablespoon oil, smashed garlic clove, rosemary, and bay leaf. Bring to a boil, then reduce heat to low and simmer partially covered until beans are tender, about 1½ hours.
  2. Drain beans and reserve cooking liquid. Discard bay leaf.
  3. In the same pot, heat remaining olive oil over medium heat. Add onion, carrot, celery, salt, and pepper. Saute until onion starts to turn golden, about 10 minutes. Add minced garlic and 1 teaspoon thyme and sauté until fragrant, about 1 minute. Add chicken broth, 2 cups of the reserved cooking liquid, and beans. Bring to a boil, then reduce heat to low and simmer partially covered until beans are very soft, about 40 minutes. Remove from heat.
  4. In a heavy skillet or sauté pan, cook chicken sausage over medium heat until no longer pink, breaking up into small pieces. Set aside.
  5. Remove 1½ cups beans with a slotted spoon. Puree remaining soup with an immersion blender or by working in batches with a regular blender. Return reserved beans to the soup and add the chicken sausage, remaining thyme, and cream. Season to taste with additional salt and pepper. Heat over medium until warmed through. Garnish with additional thyme leaves, if desired.
Notes
adapted from Bon Appetit
3.2.2499
Continue Reading

January 15, 2015

Oven-Baked Beet Chips

Oven Baked Beet Chips

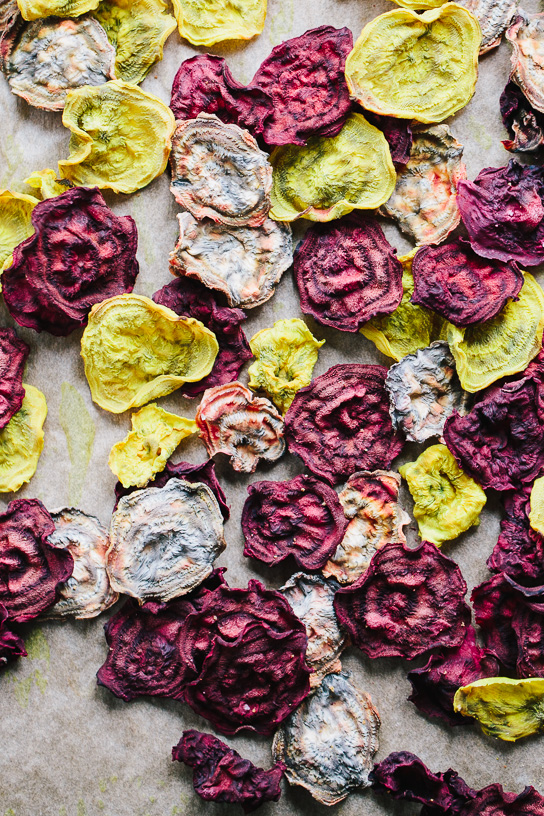
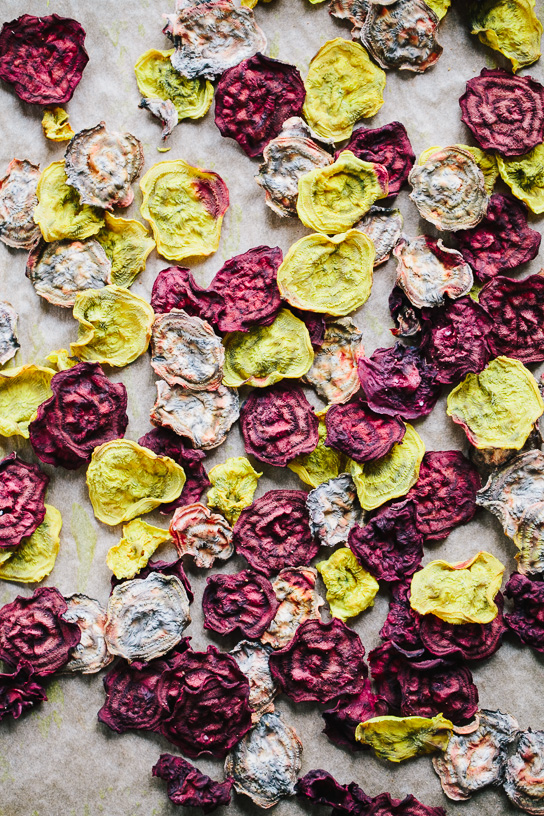
 It seems that I am always on the hunt for ways to incorporate more vegetables into my kids lunches for school.  It’s a challenge since neither of them are fond of raw vegetables (carrots being the only exception) and they only enjoy cooked vegetables when warmed.  I dream of the day when I can pack mason jar salads in their lunches, but for now veggie chips are the name of the game.  After years of being afraid of mandolines, I finally put on my brave face and bought one.  And just like that, I’m now in love with my mandoline.  I previously had visions of slicing off fingers, but I’ve realized it’s really quite safe as long as the guard is used.   It makes slicing vegetables thin such a breeze and I love the consistency that comes when using the mandoline.  Making these oven-baked beet chips have been one of my favorite ways to use my new tool.  My heart is so happy when the beets are sliced into disks of vibrant color that then shrink and turn into crisp little chips.  These are such an irresistible snack when a big bowl is left on the counter for all who walk by.

Oven Baked Beet Chips

 I used Karen Mordechai’s method of making root vegetable chips found in her gorgeous book Sunday Suppers.  The beets first need to “sweat” after lightly salting; paper towels can be used to absorb the excess liquid.  Afterwards the beets are baked for 1 to 1 1/2 hours in a 250 degree oven until crispy and crunchy.  I’ve now made a few batches of these and my most recent batch was the most loved of all.  I’ve learned that it’s easy to over salt the chips and really only a light sprinkling is all that’s necessary for the beets to release liquid.  Also, how long in the oven depends on how thick the beet slices are.  The thicker the slice, the longer it will take, and the more crunchy and cracker-like the chip will become.  I sliced my latest batch quite thin and the results were light and crispy chips.  I added a light seasoning of onion and garlic powder right before the beets went into the oven, but again only a pinch adds a lot of flavor.  Lastly, keep the various colors of beets on separate baking sheets if you do not want the colors to bleed into each other.  (I did not mind overlapping colors.)  Hard to believe, but no oil at all is needed for these chips.  Simple, beautiful, and delicious.

Oven Baked Beet Chips

Print
Oven-Baked Beet Chips
 
Ingredients
  • 3 medium sized beets (I used 1 red, 1 golden, and 1 chioggia)
  • about 1 teaspoon kosher salt
  • ¼ teaspoon onion powder
  • ¼ teaspoon garlic powder
Instructions
  1. Use a vegetable peeler to peel the skins off the beets. Trim ends off of each side.
  2. Preheat oven to 250.
  3. Thinly slice each beet using a mandoline or carefully by hand. Spread beets in a single layer on paper towels and lightly sprinkle with salt. Allow beets for rest about 30 minutes. As the beets begin to release liquid, use paper towels to absorb the liquid.
  4. In a small bowl, mix together the onion and garlic powder. Lightly season the beets. (I used an old seasoning jar.)
  5. Line 2-3 baking sheets with parchment paper and arrange beets in a single layer.
  6. Bake for 1-1½ hours, until chips are crispy. Rotate pans after 40 minutes for even baking. Store at room temperature in an airtight container.
3.2.2499
Continue Reading

January 12, 2015

Persimmon Cornmeal Muffins

Persimmon Cornmeal Muffins

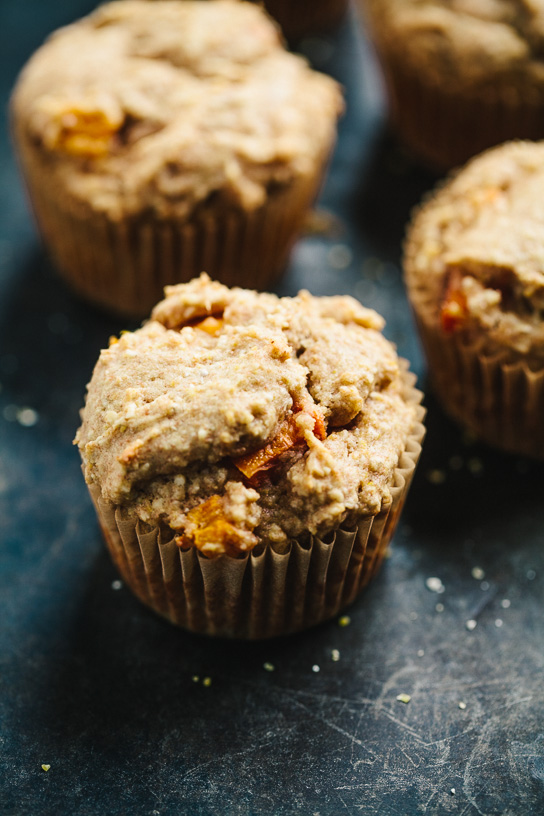
 If I had to choose one favorite fruit during the winter season, it would be persimmons.  I personally tend to favor the fuyu variety over hachiyas because I prefer a slighter firmer bite to the fruit.  Usually persimmons don’t last long enough around here for me to bake with them, but I recently discovered a sale and came home with enough persimmons to fill our entire fruit bowl.  Adding persimmons to these simple cornmeal muffins was the first idea that came to mind.  As it is when baking and roasting other types of fruit, the sweetness of the persimmons is pleasantly intensified after baking.  These muffins are whole grain, naturally sweetened, and have fragrant citrus undertones.  Baking a batch of these muffins is a bright and cheerful way to begin the day, especially on those cold and gray mornings.

Persimmon Cornmeal Muffins

Print
Persimmon Cornmeal Muffins
Serves: 12 muffins
 
Ingredients
  • 2 tablespoons white chia seeds
  • ½ cup whole milk
  • ⅓ cup yellow cornmeal
  • 1½ cups spelt flour
  • ½ cup almond meal
  • 1 tablespoon baking powder
  • ¼ teaspoon sea salt
  • zest of 1 orange
  • ½ cup freshly squeezed orange juice (from 1-2 oranges)
  • 5 tablespoons unsalted butter, melted
  • ⅓ cup maple syrup
  • 1 tablespoon vanilla extract
  • 2 cups peeled and diced fuyu persimmons (about 3 persimmons)
Instructions
  1. Preheat oven to 350. Butter or line a 12-cup muffin pan.
  2. In a large mixing bowl, whisk together the chia seeds and milk. Allow mixture to stand for 10 minutes to thicken.
  3. In a medium bowl, whisk together the cornmeal, spelt flour, almond meal, baking powder, and salt.
  4. Add the orange zest, orange juice, butter, maple syrup, and vanilla to the chia seed mixture and whisk together. Add the dry ingredients to the wet ingredients and stir with a wooden spoon until just combined. Gently fold in persimmons.
  5. Divide muffin batter among prepared muffin cups.
  6. Bake 30-33 minutes, until a toothpick comes out clean. Allow muffins to cool in the pan for 5 minutes before transferring them to a wire rack to finish cooling.
Notes
adapted from Amy Chaplin's At Home in the Whole Food Kitchen
3.2.2499


Continue Reading
  • « Previous Page
  • Page 1
  • …
  • Page 40
  • Page 41
  • Page 42
  • Page 43
  • Page 44
  • …
  • Page 69
  • Next Page »

Primary Sidebar

wholesome recipes

made for sharing

browse

posts

Categories

Archives

Your

favorites

Roasted Harvest Salad + Champagne Vinaigrette
Sausage and Kale Spaghetti Pie
Griddled Pumpkin Steel-Cut Oatcakes
Chocolate Fig Swirl Rolls

Subscribe

by email

Load More...
Follow on Instagram

Follow

on instagram

© GATHER AND DINE 2025. SITE DESIGN BY WOODEN SPOONS KITCHEN