My husband plays in a weekly tennis league and each week the men take turns bringing snacks for their after-play hang out time. This past week was my husband’s turn and I made these granola bars for him to bring along. I thought they would be the perfect healthy snack for replenishing some of their energy! I sent almost the entire batch (not the whole batch because of course we couldn’t resist eating some ourselves) and he came back with none!
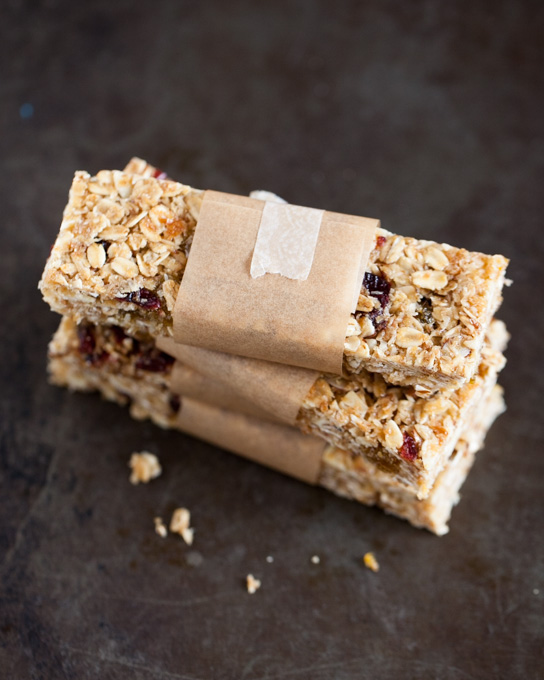
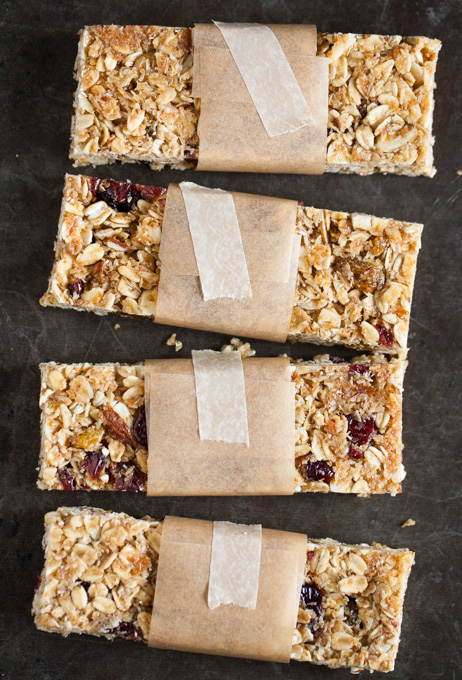
I’ve tried making several versions of homemade granola bars and these are my all-time favorite. If stored at room temperature, they are chewy with just a bit of crunch. If stored in the fridge, they become completely crunchy. I like to use my 12 x 17 baking sheet to make these because I find this makes it easier to press down on the mixture at the end. This makes quite a lot, so you can also halve the recipe and use an 8 x 12 baking dish instead as long as you be sure to press down evenly by the sides of the pan. Pressing down the mixture is an important step for keeping the granola bars together when slicing them.
- 4 cups old fashioned rolled oats
- 2 cups sliced almonds
- 2 cups unsweetened shredded coconut
- 1 cup toasted wheat germ
- 6 tablespoons unsalted butter
- 1 cup honey
- 6 tablespoons light brown sugar, lightly packed
- ½ teaspoon kosher salt
- 1 tablespoon vanilla
- 1 cup golden raisins
- 1 cup dried cranberries
- Preheat the oven to 350. Line a 12x17 inch pan with parchment paper.
- Mix together the oats, sliced almonds, coconut, wheat germ, raisins, and cranberries together in a large mixing bowl.
- Melt the butter, honey, sugar, and salt together over medium heat. Bring to a boil and let cook for about one minute. Turn the heat off and stir in the vanilla.
- Pour the wet mixture over the dry mixture and stir together until fully incorporated. Transfer mixture to the baking pan and press mixture down tightly with the back of a rubber spatula.
- Bake for 25-30 minutes, until granola is golden. Cool for about 2 hours and slice into bars.
Sarah Box says
Mmm! I bet my kids will love these. Can’t wait to try!
Janice says
Wow! These look so delicious!
Emily says
I will make sure to bring you some of my next batch. 🙂
Lauren Wang says
These look great Em! I am trying to snack on healthier foods at work and after my workouts! Great site!
Emily says
Thanks, Lauren!
Marie says
I have been obsessing over granola bars for a few weeks and I can’t seem to get enough ! These look yummy !
Emily says
Thank you, Marie!
kristi says
I must have done something wrong because mine did not stick together, they just rumbled. I tried using it like granola and it turned soggy. flavor was good though.
Emily says
Kristi, I’m so sorry that these didn’t work for you! I’ve made this recipe many times and others have told me it’s worked for them as well. It’s hard to say what may have happened without being there myself. Did you allow it to fully cool before trying to cut it into bars? Packing it down before baking is also an important step. If it turned soggy I suspect that it may have needed longer in the oven. Thanks for the feedback though. I always appreciate hearing from readers!